Getting started
Install the Profile development environment
Create a new Application profile model
Coronis SDK Profile modeling needs the installation of Eclipse framework environment http://www.eclipse.org/ with specific plugins:
· EMF: Eclipse Modeling Framework
· Acceleo: Model To Text (M2T) generator
· Coronis SDK Profile: Profile metamodel and associated editor
· Coronis SDK APIs: Coronis SDK dependant APIs
How to install the environment?
v First possibility - Use the web update site (recommended)
Firstly, you have to install the Eclipse framework (Helios or Indigo version)
· http://www.eclipse.org/downloads/packages/release/helios/sr2
· If you have no Eclipse framework installed, it’s recommended to install the “ECLIPSE for RCP developers”
Secondly you have to add the required “Update Software Sites”
· Window à Preference à Install/Update à Available Software Sites
· Add the 2 following sites using the button “Add…” and enter following information
o Acceleo 3.2.1 - http://download.eclipse.org/modeling/m2t/acceleo/updates/releases/3.2
o Coronis SDK Profile Model - http://coronissdk.sourceforge.net/update/profile-model
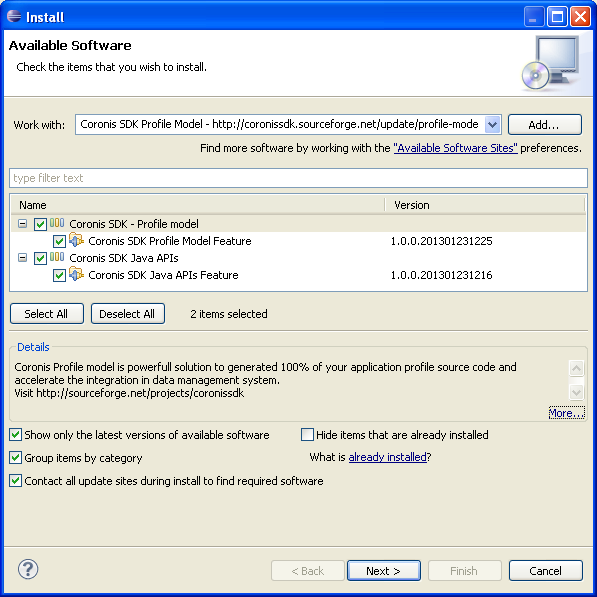
Finally you have to install the Coronis SDK Profile model feature
· Help à Install New Software…
· Select the “Coronis SDK Profile Model” in the proposed sites list
· Check the 2 proposed features and install them
v Second possibility – Upload each feature individually
Firstly, you have to install the Eclipse framework (Helios or Indigo version)
· http://www.eclipse.org/downloads/packages/release/helios/sr2
· If you have no Eclipse framework installed, it’s recommended to install the “ECLIPSE for RCP developers”
Secondly, you have to install individually the following features:
· ACCELEO RUNTIME feature - version 3.2.1
ü http://download.eclipse.org/modeling/m2t/acceleo/updates/releases/3.2
· EMF VALIDATION FRAMEWORK feature - version 1.4 (equals or higher)
ü http://download.eclipse.org/modeling/emf/updates/
· Eclipse Plug-in Development Environment feature - version 3.6.2 (or compatible)
ü http://download.eclipse.org/releases/helios / General Purpose Tools category
Finally you have to install the Coronis SDK Profile model feature
· Upload on Coronis SDK site the feature archive and unzip it inside your Eclipse folder.
ü Warning: by this way, prerequisites are not checked and automatic update will not be activated.
v Create the profile project
1. Open the creation project wizard and select Coronis SDK Profile Project : File à New à Project... (Other category)
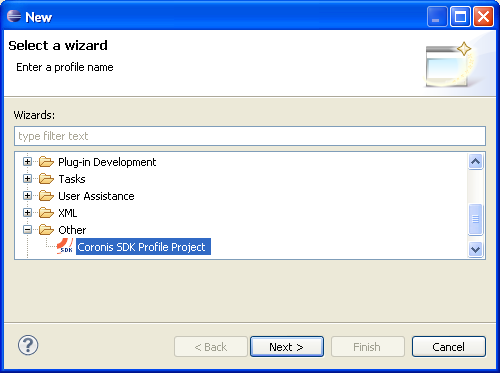
2. Enter the name of your project. This name will be used as your profile Identifier.
o Take care to not use special characters as space, “;”, “/”, etc…
3. After the validation of the project creation, the model of the profile will be automatically open (model/projectName.csprofile)
4.
Click right on the Profile element ![]() and select the action “Show Properties View”!
and select the action “Show Properties View”!
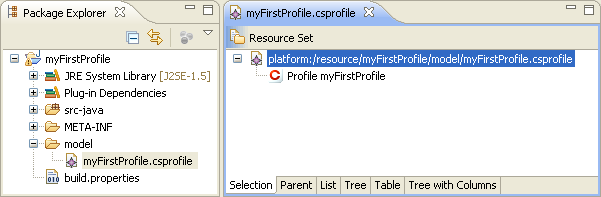
You are now ready to describe your profile!
v Model a Request & Response exchange
The aim of this chapter is to show how exchanged Payload with a radio device is modeled into the Coronis SDK Profile model.
We will suppose here that our device support only one request (0x01) and answer to the request by a response (0x91) that include its sensor value (unsigned integer stored on 2 bytes).
Create the measure data
1.
Click right on Profile element ![]() and select the action New Child à
and select the action New Child à ![]() Number Data
Number Data
2. In the properties view, enter the Name and select the Format of the measure.
o Ex: Name: sensor / Format: UNSIGNED_INT_16 / Is Measure: true
Create the response message
3.
Click right on Profile element ![]() and select the action New Child à
and select the action New Child à ![]() Message from Device
Message from Device
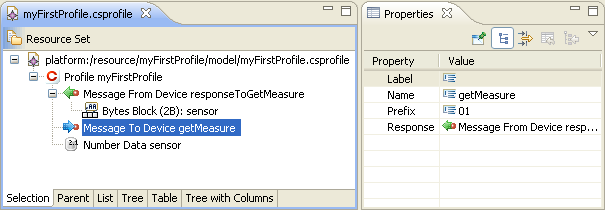
4. In the properties view, enter the Name and the hexadecimal Prefix of the response message.
o Ex: Name: responseToGetMeasure / Prefix: 91
5.
Click right on Response element ![]() and select the action New Child à
and select the action New Child à ![]() Bytes block
Bytes block
6. In the properties view, select the data sensor for the created block.
Create the request message
7.
Click right on Profile element ![]() and select the action New Child à
and select the action New Child à ![]() Message to Device
Message to Device
8. In the properties view, enter the Name and the hexadecimal Prefix of the request message. Select also the Response responseToGetMeasure.
o Ex: Name: getMeasure / Prefix: 01
Validate the profile
9.
Click right on Profile element ![]() and select the action Validate. If all field have been correctly
entered, you must see the following message:
and select the action Validate. If all field have been correctly
entered, you must see the following message:
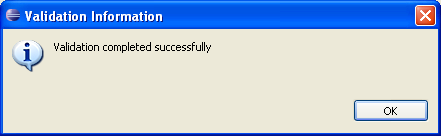
Congratulation, you have created your first model of a Request & Response exchange! You are now able to generate your Profile library.
To go further in Model possibilities, see the Concepts chapter.
This chapter supposes that the chapter “Create a new Application profile model” has been made.
v Generate the Java source code of the profile
1. In the “Package Explorer” view, click right on the model of profile file and select the action Acceleo Model to Text à Generate Coronis Java Profile
2. Three new Java files must be generated in src-java folder
o MyFirstProfile.java: the main class of the profile that implements the IApplicationProfile (Profile API)
o GetMeasure.java: the representation of the request message.
o ResponseToGetMeasure.java: the representation of the response message.
v Export the Java library
Due to the fact that the generated java source code is OSGI compliant, the easiest way to generate the Java library that correspond to the created profile is to
1. Open the manifest file (META-INF/MANIFEST.MF)
2. Select in the Header tool bar of the Overview tab the action “Export deployable plug-ins and fragment”
3. Enter the Destination directory in the Export dialog
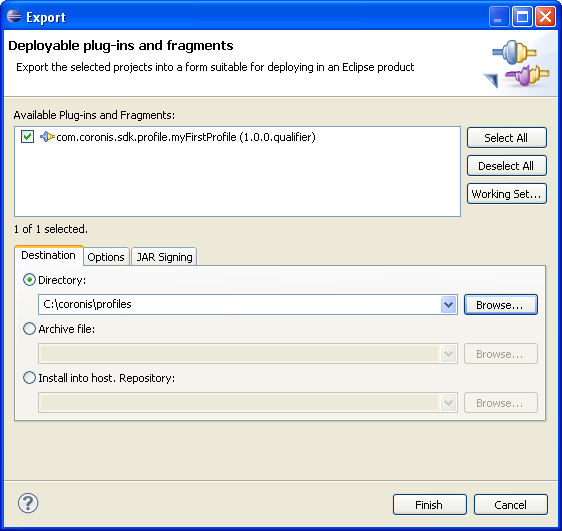
You can now integrate your .jar in your Java application.
This chapter is not yet documented. Welcome soon.